|
|
|
Email Client Configuration - IMAP Operating
System: iPhone and iPad OS This page provides step-by-step instructions for setting up email on your iPhone and iPad. The iPhone and iPad use the same setup screens. We'll show the iPhone but the iPad is almost exactly the same. The iPhone can be configured as a POP3 or IMAP email client. Since Intersessions supports both protocols it is generally better to configure the iPhone for IMAP. That way your emails won't be inadvertently deleted from the mailserver when they are downloaded to the iPhone. Unless you consciously delete the emails from your inbox your email will still be available for download to your office PC. Step By Step Instructions
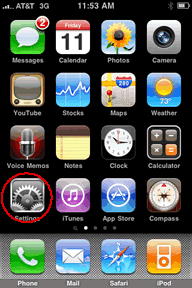
1. Touch Settings in your application listing
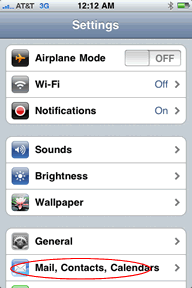
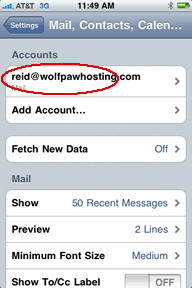
2. Touch 'Mail, Contacts, Calendars' in the settings list
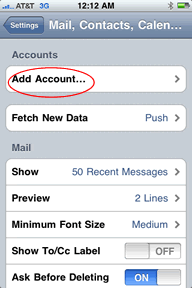
3. Touch 'Add Account...' and then 'Other'.
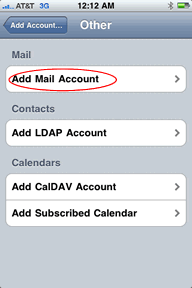
4. Touch 'Add Mail Account'
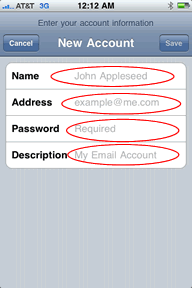
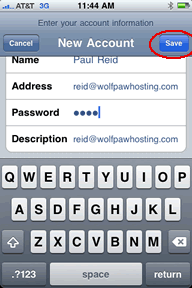
5. Enter your name, the email address you're setting up, your email account password and a description (i.e. what you want to call this email account). Then touch 'Save'.
6. The iPhone will respond with a message at the top of the screen saying it is looking up account information. This lookup will fail and a screen will appear letting you enter your mailserver information.
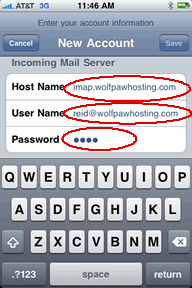
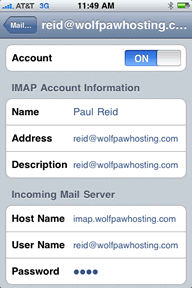
7.
Make sure IMAP is selected at the top and enter your INCOMING
mailserver information.
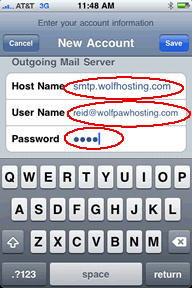
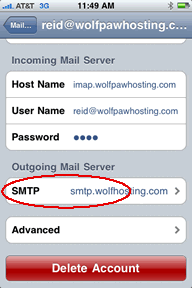
8. Scroll down and now enter your OUTGOING mailserver information. Host
Name: smtp.your_domain_name Then touch 'Save'.
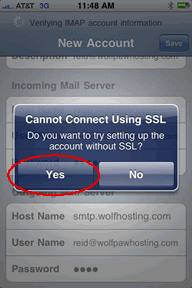
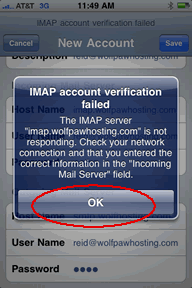
9. The iPhone will attempt to connect to your email account but probably fail. You'll see messages similar to the above. In each case select 'Yes' or 'OK' to force the iPhone to accept the information entered.
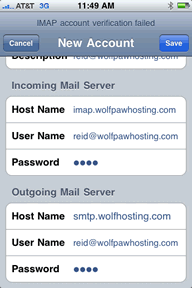
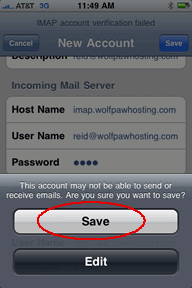
10. Touch 'Save' again and 'Save' again in the warning message.
11. Go back to 'Settings', 'Mail, Contacts, Calendars' and touch your email account. You'll see a configuration screen with the mailserver information you entered previously.
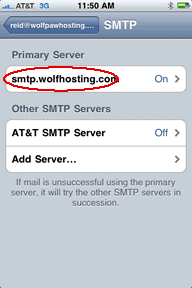
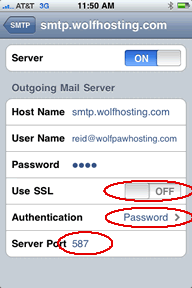
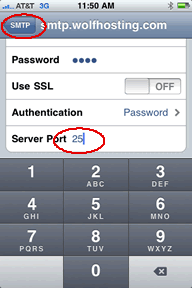
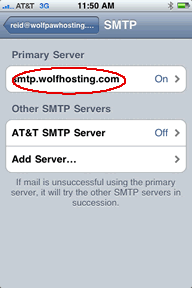
12. Scroll down and touch 'SMTP' and then, under Primary Server, touch the smtp server you enter previously.
13. In the details for your SMTP server make sure 'Use SSL' is OFF, Authentication is set to 'Password'. Then change the Server Port from 587 to 25. Press 'SMTP' at the top to return to the previous screen.
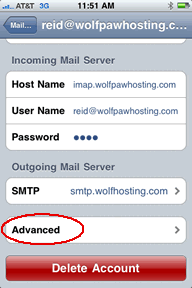
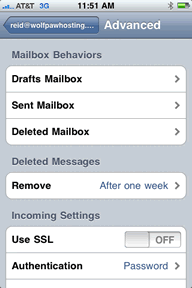
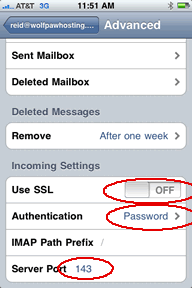
14. Touch your primary server again and then touch 'Advanced'.
15. Scroll down to 'Incoming Settings'. In the details for the incoming server make sure 'Use SSL' is OFF, 'Authentication' is set to Password and the 'Server Port' is set to 143. Then touch your email address at the top left to return to the previous screen.
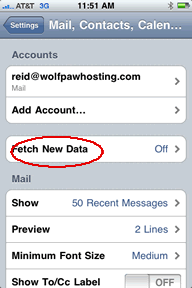
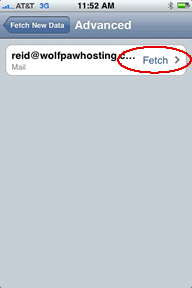
16. Touch 'Fetch New Data'. Make sure 'Fetch' is set to Manually. Then touch 'Advanced'.
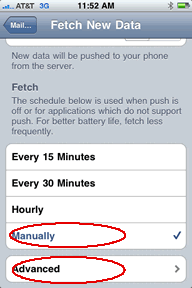
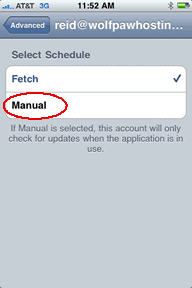
17. Touch 'Fetch' and the in the 'Select Schedule' screen touch 'Manual' to make sure that is set to 'Manual' also.
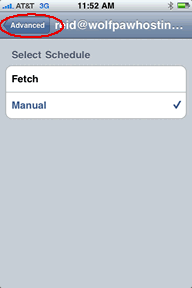
18. Touch 'Advanced' in the top left and use the Home button to return to your Application screen.
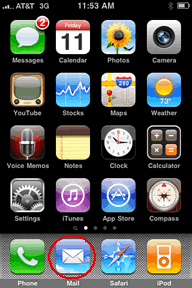
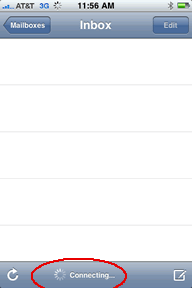
19. Touch the mail icon to get your mail. You'll see the 'connecting message' at the bottom and your email will begin downloading. Troubleshooting: Go back through the email account menus and windows and verify your entries. 1. Make sure your username is your full email address. 2. Your incoming mailserver should be in the format imap.your_domain_name. 3. Your outgoing mailserver should be in the format smtp.your_domain_name. 4. The outgoing mail server port should be 25. (You can also try 26.) 5. The incoming mail server port should be 143.
|
Copyright 1996-2021 Intersessions Inc. all rights reserved
Box 555, Tenafly, NJ 07670
≡ ☰ 201-569-1762 or 201-926-5170 (Voice), 201-569-7898 (Fax)
Email support@intersessions.com.